Creating a Funded Program Instance (VIC)
CREATING YOUR VIC-FUNDED PROGRAM INSTANCE
Setting Up your Program Instance Details
Step 1. Add a new Program Instance
- Go to PROGRAMS in the menu.
- Select PROGRAM INSTANCES in the Programs menu.
- Click ADD.
Step 2. Complete the Program Information details.
- Select the Program* from the drop-down menu
- Enter the Program Instance Name*
- Enter Duration* in days
- Select Program Participation from the drop-down. This could be full-time, part-time or self-paced.
- Select the if the program type* is Dynamic or Intake from the drop-down.
- Select if the program requires LLN.
- Select the Location for the program instance.
- Enter the number of Core units* for this program instance
- Enter the number of Elective units* for this program instance.
- Select if the program instance requires a Host employer or vocational placement provider.
- Select if the program instance requires delivery with a partner training organisation.

Items marked with asterisks are required fields before you can save the program instance.
Step 3. Complete your Program Instance AVETMISS information
Click on the AVETMISS tab. Select the Reporting State under the AVETMISS Data section.

It's important to select the correct reporting state here as fields will vary depending on the state.
Complete the details for the AVETMISS Data:
- Select the applicable Funding Source - National from the drop-down.
- Select the Unit Delivery Mode from the drop-down. Unit Delivery Modes for WA could be Internal, External, Workplace-based only, or a combination of those delivery modes.
- Select if this program instance is a VET in Schools program.
- Nominal Hours in the Program Instance calculates from the total nominal hours of all the Units in this program instance once the units are added.
- Click Save.
Ensure that your units are properly set up in the UNITS tab before adding them to the program instance. Refresh the page after adding units with nominal hours to populate the information for the Nominal Hours field.
Once the program instance has been saved, additional menu options will appear for the program instance. Navigate to the AVETMISS tab again.
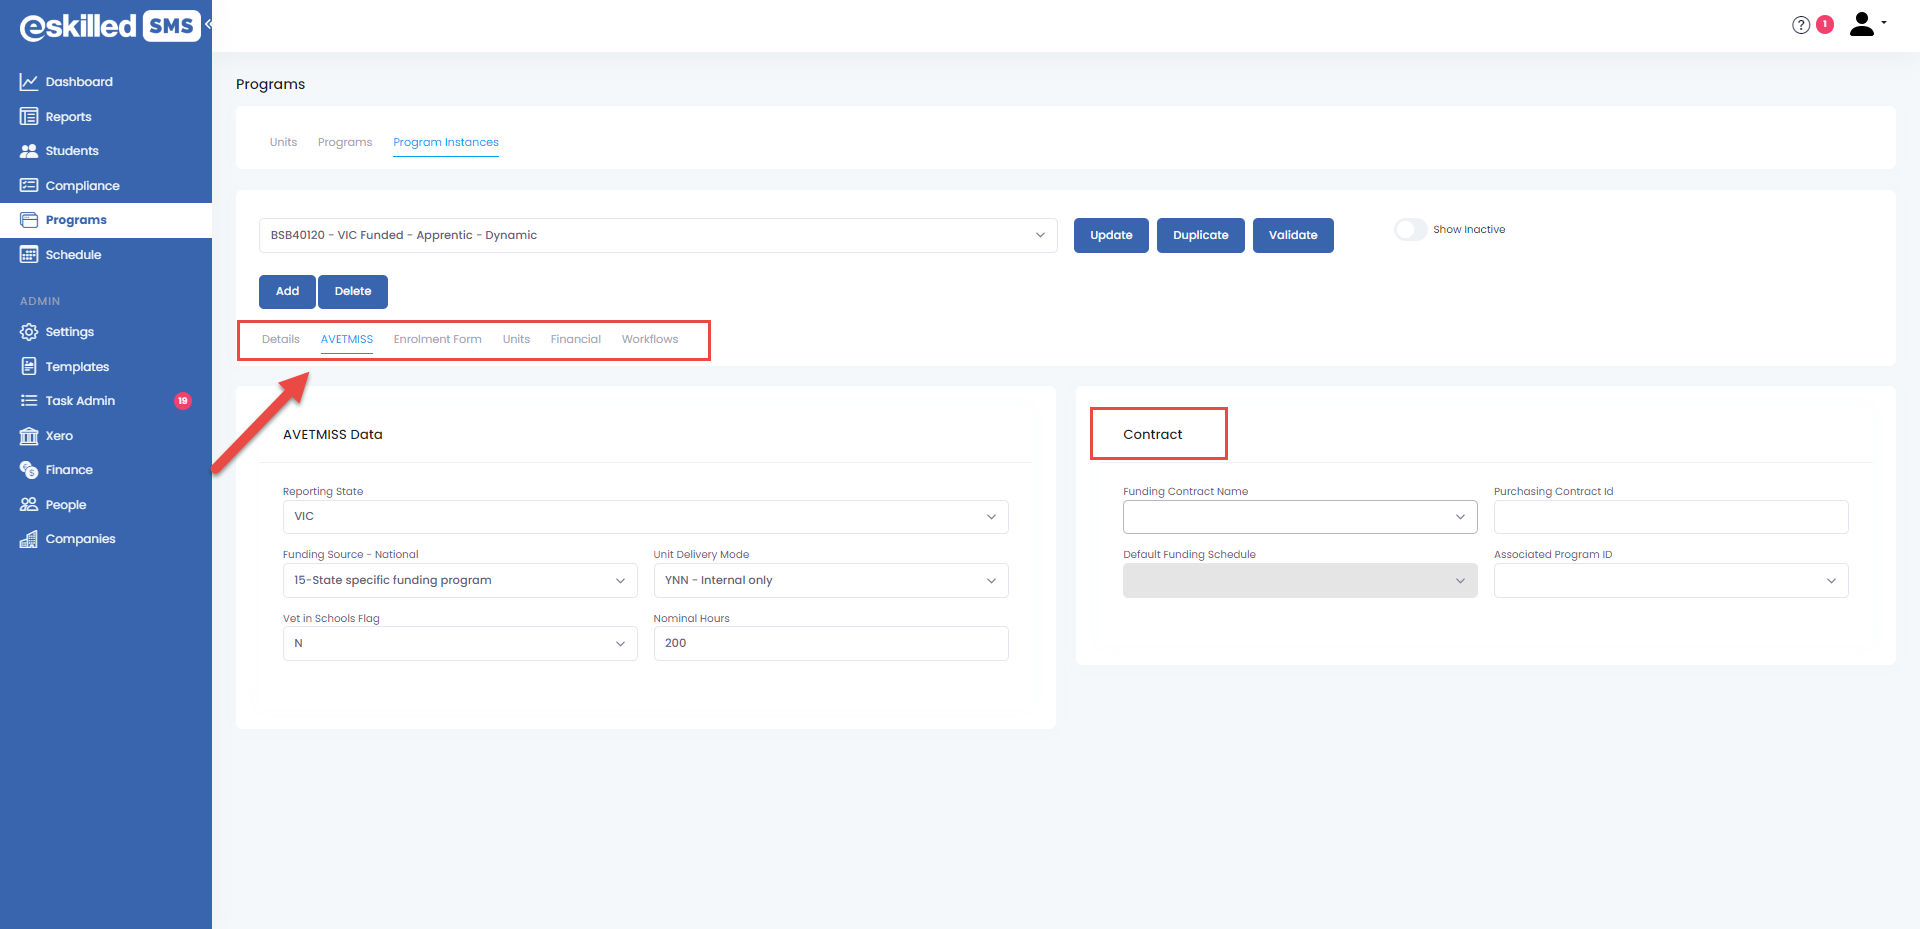
Complete the Contract details.
Select the Funding Contract Name from the drop-down.
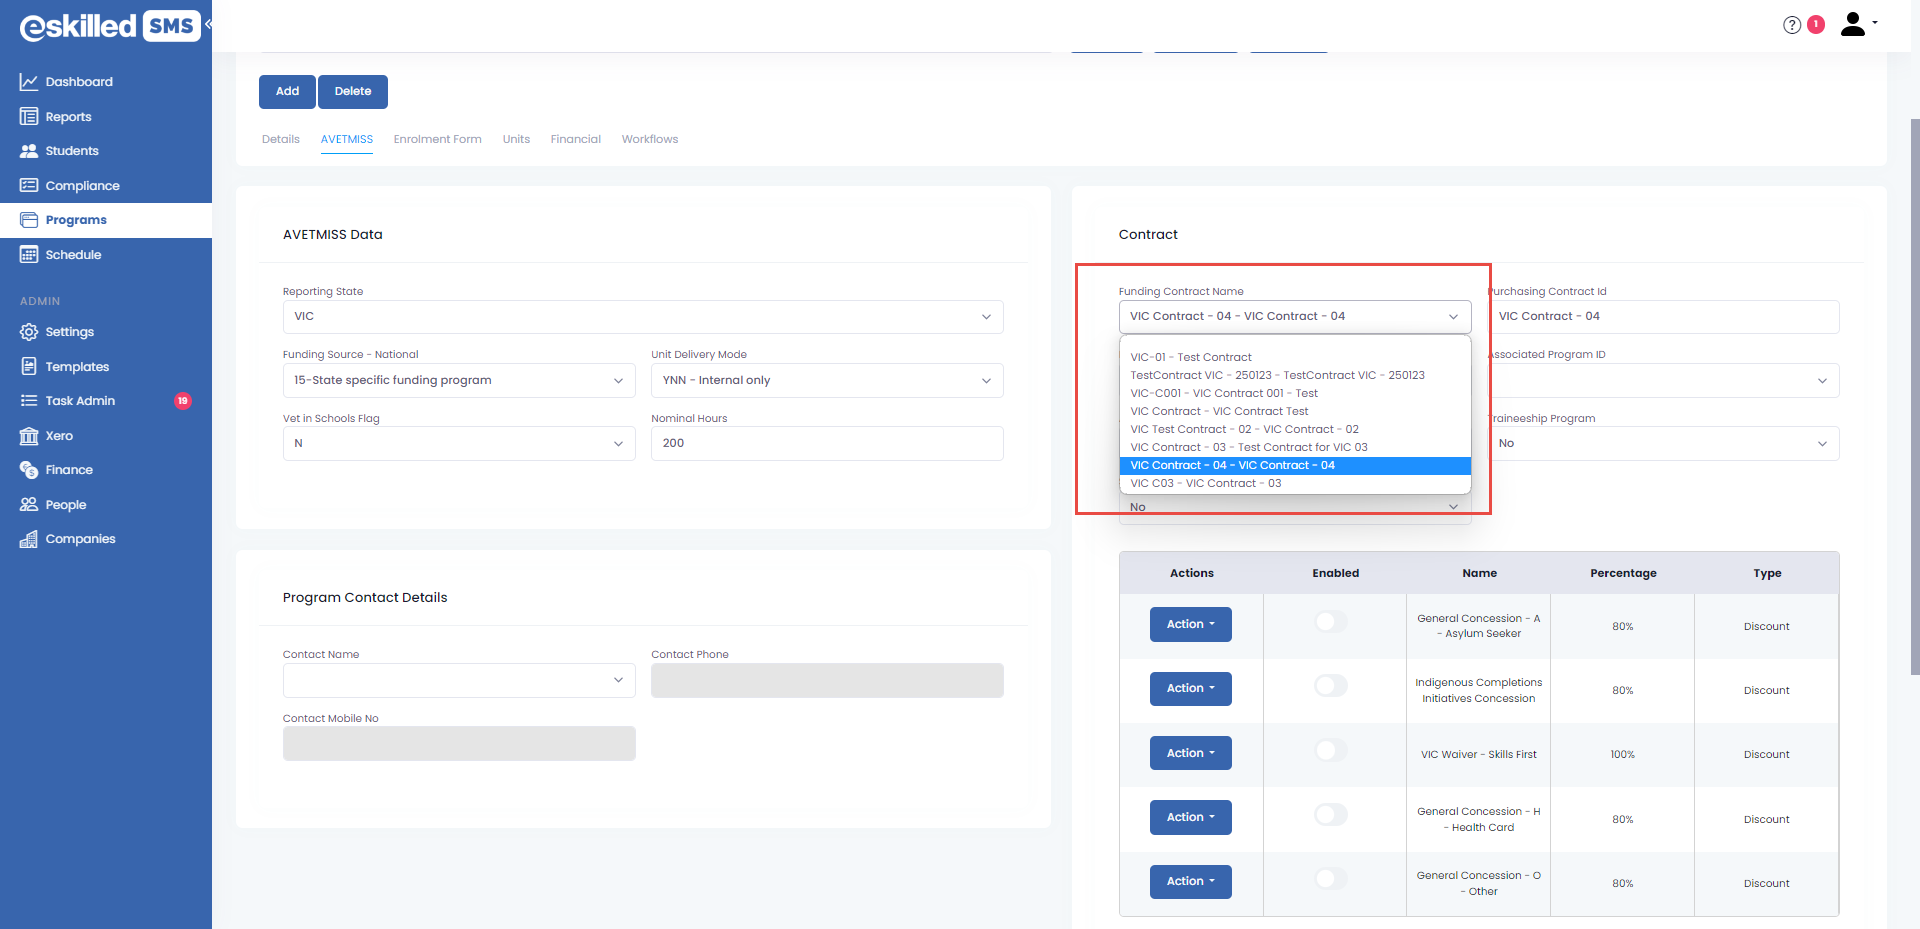
In order for Contracts to appear here, you must have created Contracts already in the Finance Tab and set those contracts for VIC. Only Contracts that are set for the specific state will appear in the drop-down options.
Once a Funding Contract has been selected, the Purchasing Contract ID field will automatically fill the Contract ID you have set for this Contract. If the Funding Contract has just one Funding Schedule, the Default Funding Schedule field will default to that schedule. Otherwise, choose a funding schedule from the options available in the drop-down menu.
Once a default funding schedule has been selected, if there are any concessions and waivers included in that schedule, will show in the table below. Toggle the enable field to select which concession/waiver can be used for this program instance.
The Concessions/Waivers table can also be edited by clicking on the Action button. You can edit the Name and the amount of the concession/waiver from this table.
Select if the program instance is for Apprenticeship, Traineeship or School-Based Apprenticeship/Traineeship (SBAT).
Selecting YES to any of these fields will add a Training Plan section in the AVETMISS tab, as well as add a Training Plan tab in the Enrolment Wizard. Select the Associated Program ID from the drop-down.
Once all the fields are filled in, click UPDATE to save and update your program instance.
Step 4. Set up the Enrolment form of your funded Program Instance
Update your Enrolment Form by going to the ENROLMENTS tab in the program instance menu.
- Enrolment Form Type - Select the Enrolment Type, whether Standard or Express. Express enrolment form has less information required from the students, while the Standard enrolment form will include all details needed for AVETMISS reporting.
- Accepting Enrolment field - Select if the program instance is accepting enrolment.
- USI Required field - Select if the USI is required to be provided in the enrolment form.
- Show Upload Document field - Select if the Upload document button will show in the online enrolment form. Selecting YES show an upload document field in the online enrolment form and will allow students to upload files. Selecting YES will add another field labeled "Require Document Upload". Select if Document upload is required. Selecting YES will make the document upload field a requirement before the enrolment form can be submitted.
- Emergency Contact details field - Select if Emergency Contact details are required to be provided in the online enrolment form. Selecting YES will make the emergency contact details field a requirement before the enrolment form can be submitted.
- Profile Image Upload - Select if the Profile image upload will be available in the enrolment form. Options are: "Show and Require", "Show but not required" or "do not show in the enrolment form".
- Industry of Employment - Select If the "Industry of Employment" field will be shown in the enrolment form. Options are: "Show and Require", "Show but not required" or "do not show in the enrolment form".
- Victorian Student Number - Select if the VSN field will be shown in the enrolment form. Options are: "Show and Require", "Show but not required" or "do not show in the enrolment form".
- Occupation ID - Select if the Occupation identifier field will be shown in the enrolment form. Options are: "Show and Require", "Show but not required" or "do not show in the enrolment form".
- Commenced while at school flag - Select if this field will be visible in the enrolment form. Options are: "Show and Require", "Show but not required" or "do not show in the enrolment form.
Some of the enrolment form fields are state-reported fields and may be required by your state when doing reports for funding. Tag fields as required if these are details you need for the students to complete.
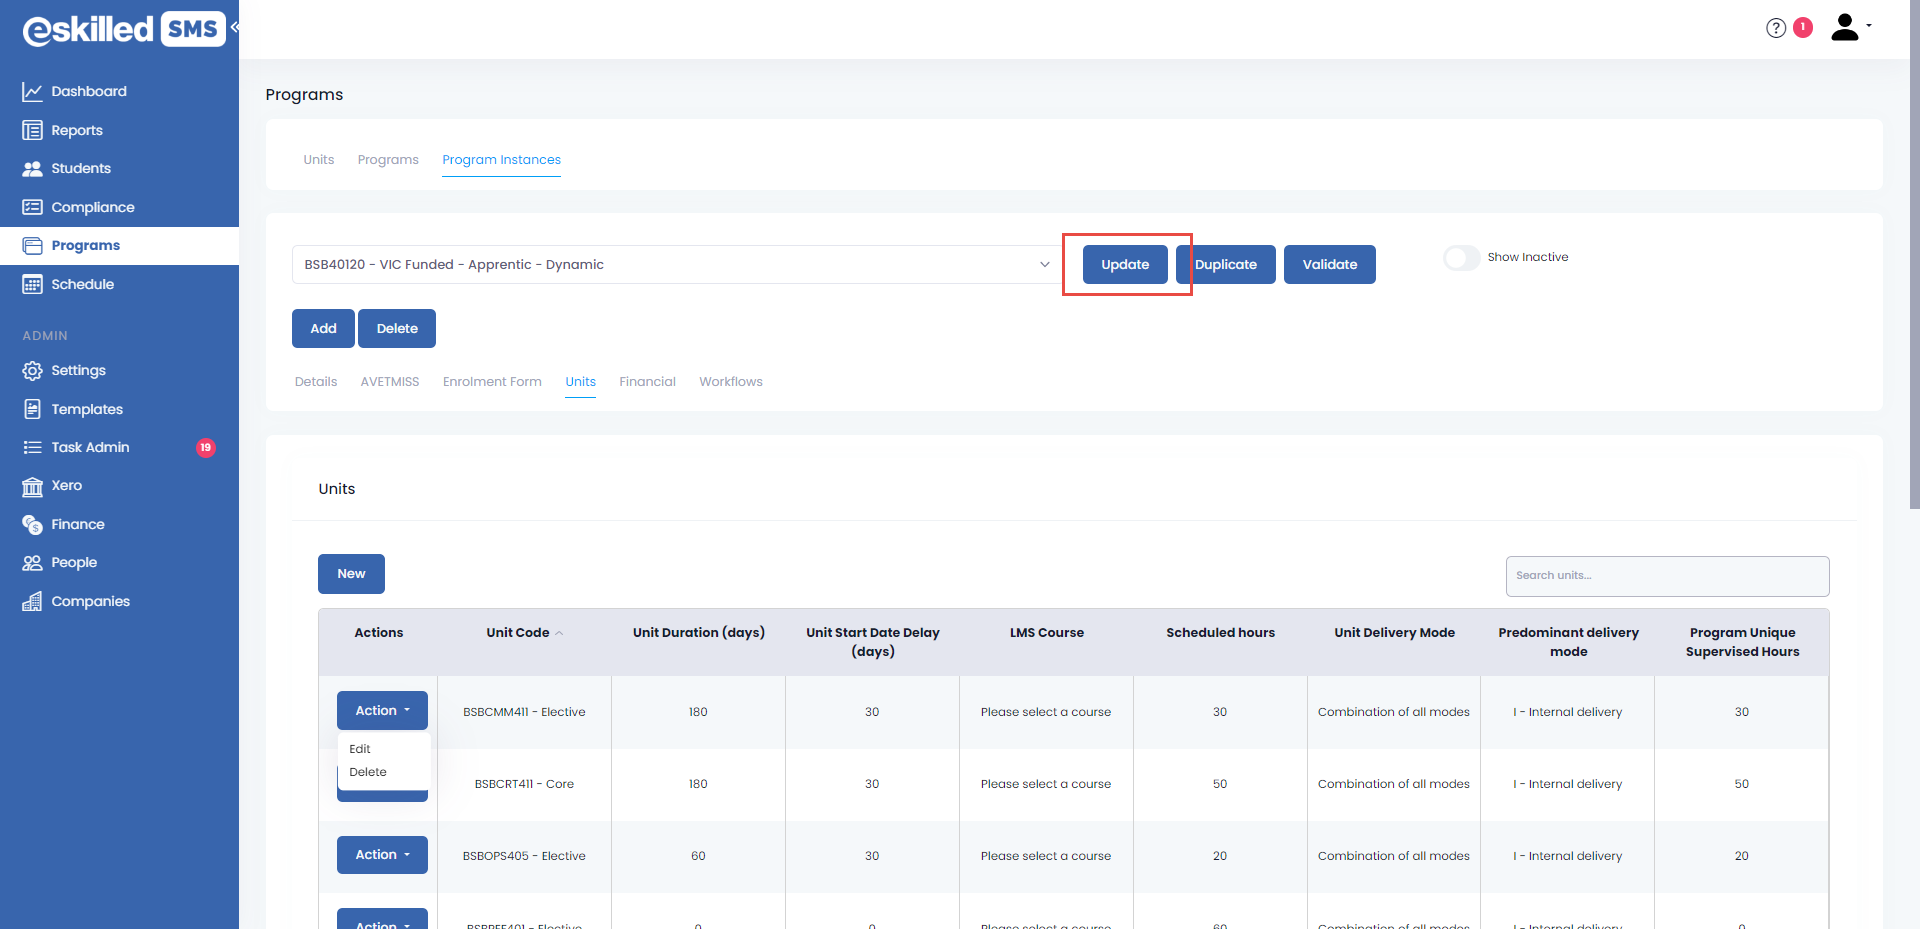
Step 5. Set up Units for your funded program instance.
Start by adding Units to the Program Instance. Go to the Units tab of the Program Instance. Click New.
Units should follow the packaging rules for the program according to training.gov.au.
Complete the Unit information in the pop-up window.
- Unit Code - Select the unit from the list of available units in the drop-down menu. The units here will be the available units for the Program based on TGA.
- Unit Duration (days) - enter the unit duration
- Unit Start Date delay - enter the number of days for the unit start date delay
- LMS Course - select the associated LMS course for this unit (Available only if LMS is connected to the SMS)
- Unit Delivery Mode - select the delivery mode for this unit in the drop-down
- Predominant Delivery Mode - Select the predominant delivery mode for this unit. If the selected option for the Unit delivery mode is one mode only, the predominant delivery mode will default to the same delivery mode. If the Unit delivery mode has two options (eg. Workplace or Internal delivery) the Predominant delivery mode options will only show those two options in the drop-down.
- Scheduled Hours - enter the training scheduled hours for this unit.
- Program Unique Supervised Hours - Enter the unique hours of supervised training and assessment activity for this Program Enrolment.
You can also edit the Units information for this program instance by clicking on Edit from the ACTION button. Selecting EDIT will open the Units edit window.
Click Update to save and update your changes.
Step 6. Set up Program Fees and Payment Plans for your funded program instance
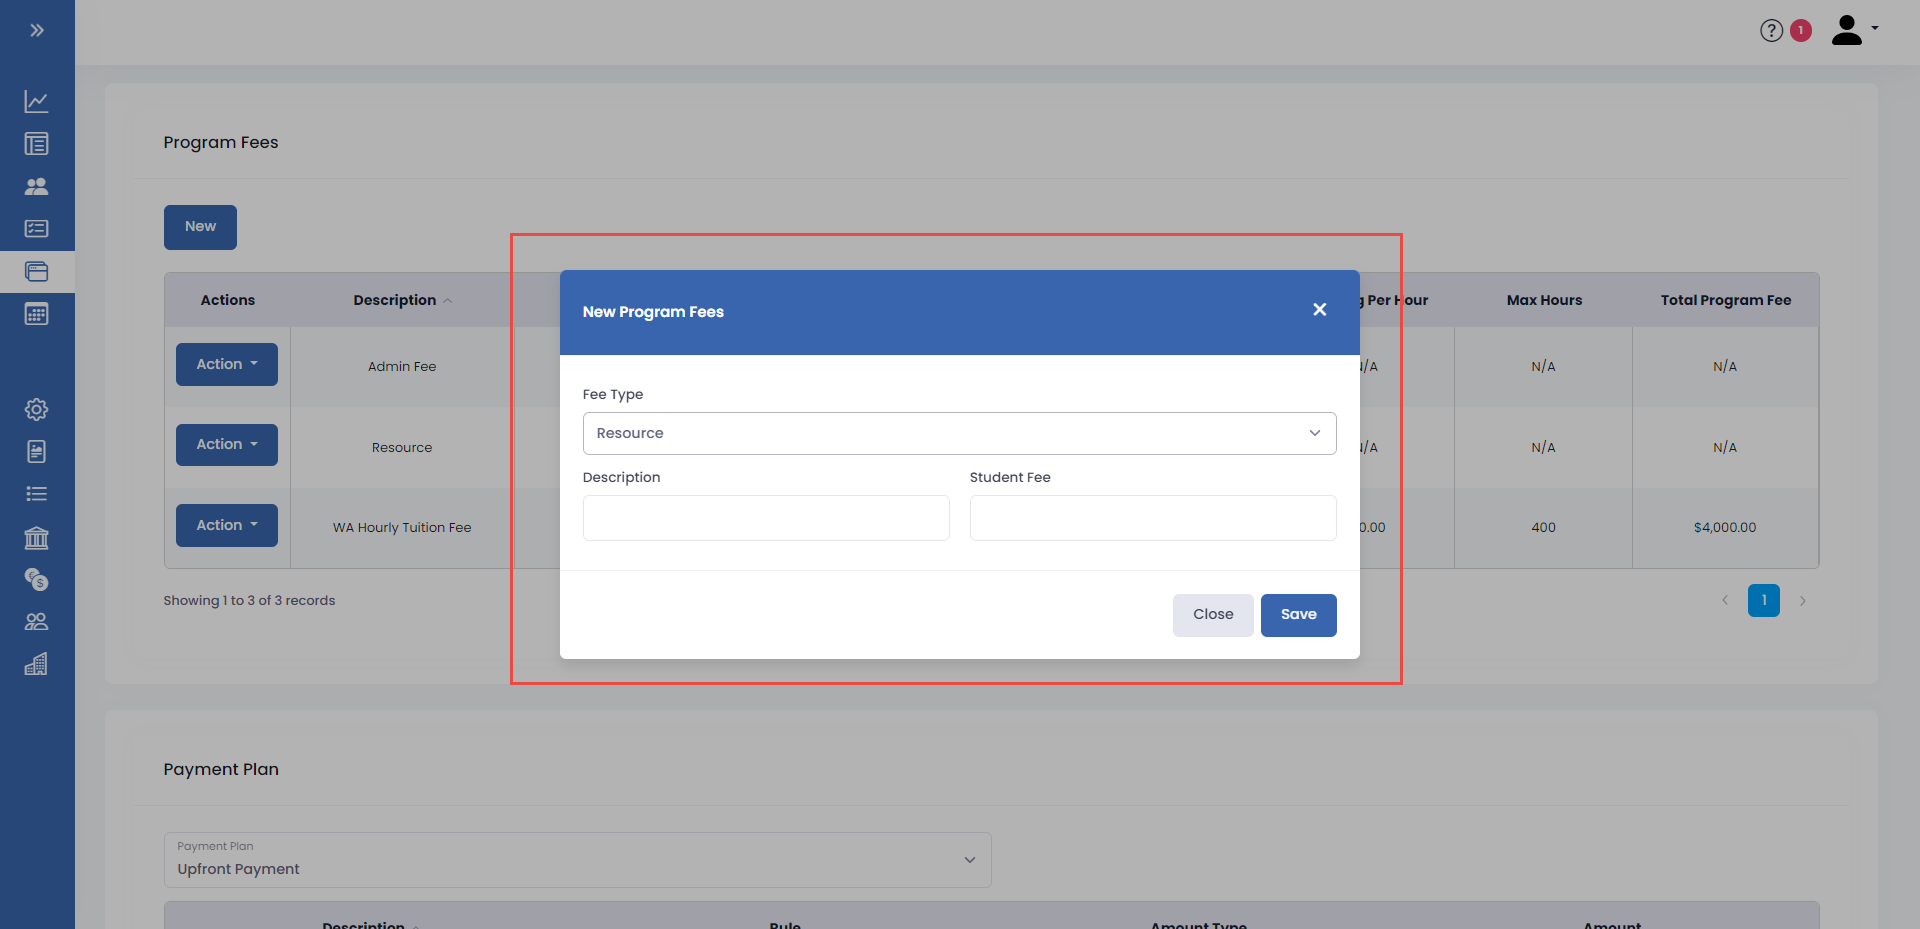
Navigate to Finance Tab to set up Program fees and payment plans. Click NEW.
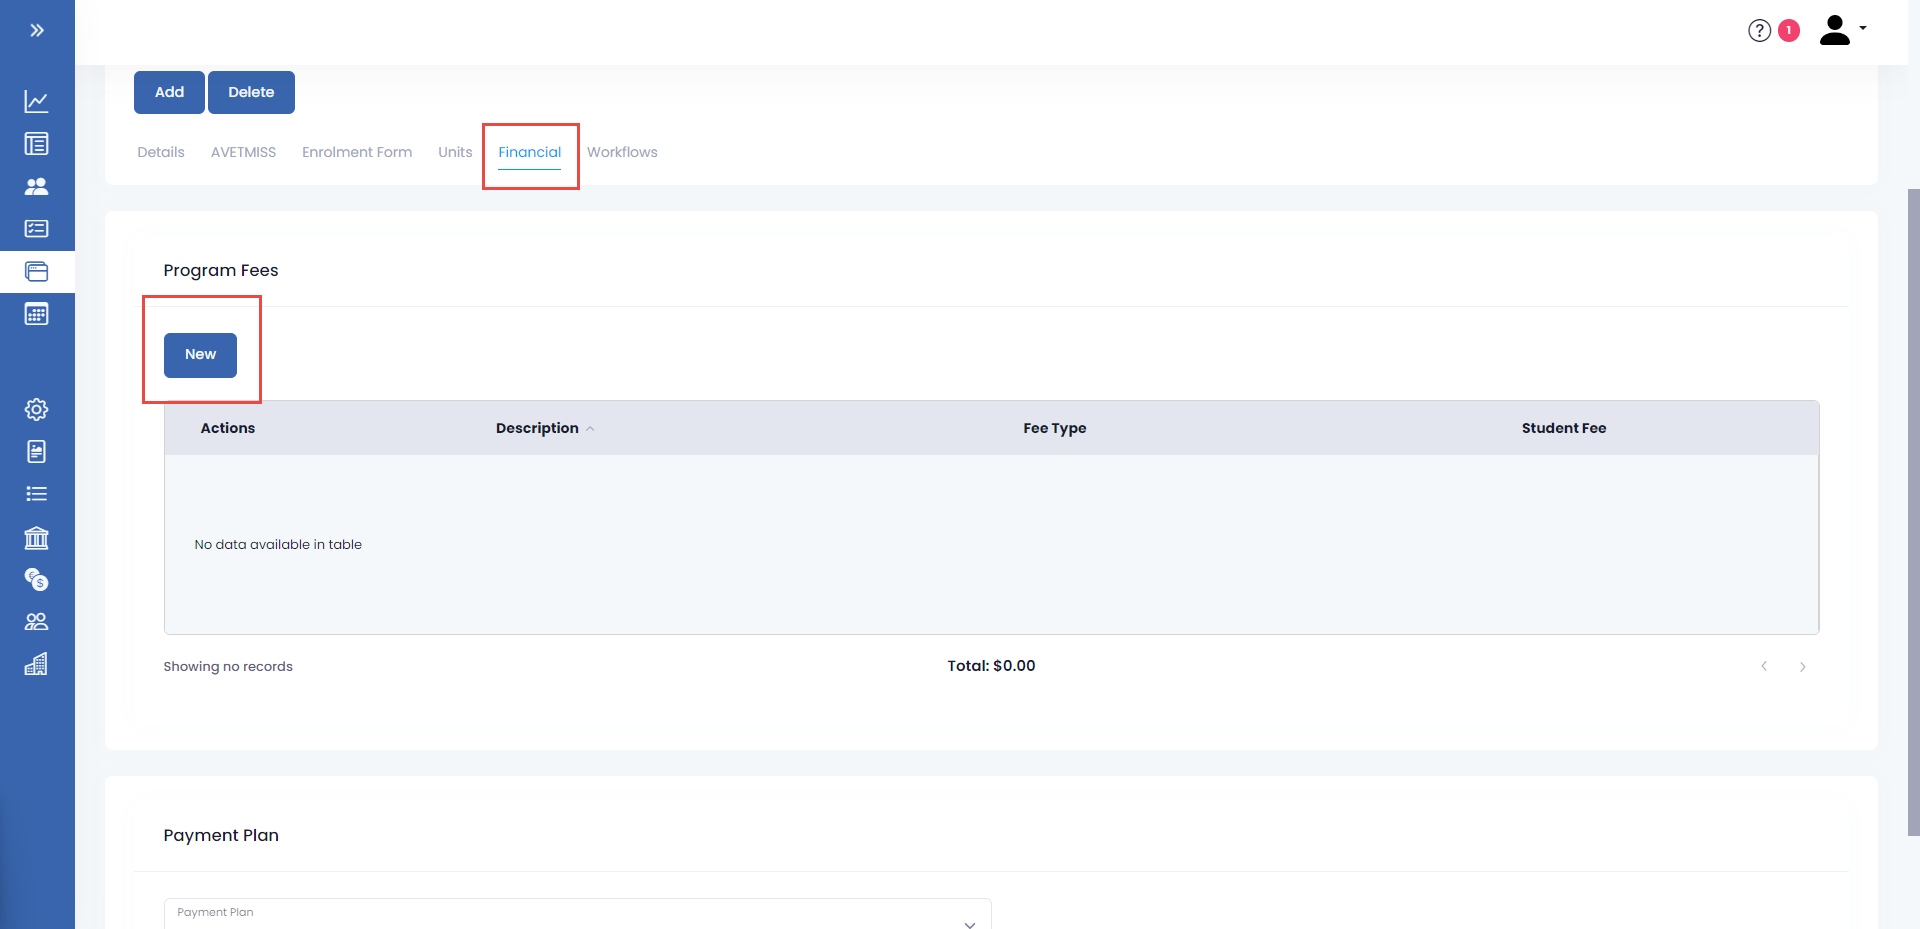
A modal window will open, choose the Fee type from the drop-down. Fees could be Tuition, Resources or Other.
A modal window will open, choose the Fee type from the drop-down. Fees could be Tuition, Resources or Other.
Select Tuition in the Fee type to set up Tuition Fees.
The following reference was used in adding details to this Program fee:
Source: Funded Courses Report And Student Tuition Fee Contribution Report
Refer to your contract details and updated State rules when creating program fees.
- Enter a description for the fee.
- Enter the Max Hours for this program.
- Enter the Student Hourly Fee or the Student Fee. The Student Hourly Fee is the Student fee divided by the number of scheduled hours for the program instance, while the Student Fee is the student hourly fee multiplied by the number of scheduled hours. Entering information on one of the fields will calculate the other field based on that computation.
- Enter the Funding Per Hour amount or the Funding per Program amount based on your funding contract or the updated report.
- The total Program Fee will calculate based on the Student Fee and the Funding amount.
- Click Save when complete.
Set up additional fees such as Resources fee or Others by clicking on the New button and selecting Resource or Others in the drop-down menu. Enter a Description and the fee. Click Save.
You can add multiple Tuition Fees, Resource Fees and Other Fees in the Financial Tabs. Click on the Action button to Edit or Delete any existing program fees.
Next, Add a Payment Plan to the Program Instance by selecting from the drop-down menu.
If Payment Plans are not available in the drop-down, make sure to set up a payment plan option in the Finance Tab under Payments Plan. Ensure that the Payment Plan options align with the total of the items for the Program Instance.
Click Update to save and update your Program instance.
You have now created a VIC-funded program instance!
Related Articles
How to Set Up Your Program Instance for VSL Report Collection
Overview VET Student Loans is a program that helps eligible students to enrol into approved VET Courses. All VET Student Loan (VSL) providers (‘providers’) that are approved under the VET Student Loans Act 2016 are required to report data for the VSL ...Creating a Funded Program Instance (WA)
CREATING YOUR FUNDED PROGRAM INSTANCE Setting Up your Program Instance Details Step 1. Go to PROGRAMS in the menu. Step 2. Select PROGRAM INSTANCES in the Programs menu. Step 3. Click ADD. Step 4. Fill in the information required. Select the Program* ...Enrolling a Student in a Funded Program Instance (VIC)
Enrolling a Student in a VIC-Funded Program Instance There are multiple ways to enrol a student in the Student Management System. A system administrator can manually create a student and then enrolling them using the Enrolment Wizard. Another option ...How to Create a Program for a Qualification, Accredited Course, Unit/Modules or Skill Sets
OVERVIEW Programs in the eSkilled Student Management System refers to Courses which could be a nationally accredited training program, a qualification, part qualification, unit/s or module/s or a non-accredited course. Planning and setting up your ...How to Create a Program for a Non-Accredited Course
OVERVIEW Programs in the eSkilled Student Management System refers to Courses which could be a nationally accredited training program, a qualification, part qualification, unit/s or module/s or a non-accredited course. Planning and setting up your ...