How to Generate an Enrolment Report in the SMS

Overview
In this tutorial, we will guide you through the process of
creating an enrolment report in the SMS. You will learn how to customise report
by selecting and including only the necessary fields to meet your specific
needs. Additionally, we will demonstrate how to effectively use the filter
feature to narrow down your report, ensuring you obtain the most relevant and
targeted data. Whether you want to track student enrolments or generate
detailed reports for administrative purposes, this tutorial will equip you with
the knowledge and tools needed to maximise your SMS reporting capabilities.

Step
Tutorial
1. From the sidebar menu, go to Reports > Enrolments > then click New to add a new enrolment report template.
2. Enter a Name for your report. If you
prefer to make it your default report template, toggle the Default field.
Then click Save.
 NOTE: You can always quickly view and check an
enrolment report without the need to create an enrolment template. If you
prefer not to use a template, leave the Enrolment Template field blank and
proceed directly to setting the filters needed. This flexibility is
particularly useful for ad-hoc reporting needs or when you need immediate
insights into enrolment data without setting up a formal template.
NOTE: You can always quickly view and check an
enrolment report without the need to create an enrolment template. If you
prefer not to use a template, leave the Enrolment Template field blank and
proceed directly to setting the filters needed. This flexibility is
particularly useful for ad-hoc reporting needs or when you need immediate
insights into enrolment data without setting up a formal template.3. Click Fields. This will open a new modal where you can customise the specific enrolment fields you want to include in
your report.
To add a field, select one from the 'Please select fields you want to show' column (left). To select multiple fields, either hold down the Ctrl key on your keyboard while clicking the fields you’d like to add, or highlight them using your mouse pointer. Then click on the right arrow button to add the selected fields.
To exclude fields from the report, select the fields under the 'Fields selected' column (right). Then click on the left arrow button to remove the selected fields.
You can move all fields all at once without selecting them individually using the following buttons:
- Move all fields from the 'Please select fields you want to show' column to the 'Fields selected' column.
- Move all fields from the 'Fields selected' column back to the 'Please select fields you want to show' column.
After selecting the fields to add or remove, click Save.
4. Set a date range for your
report.
There are two available methods
to set a date range. You can choose either of the following
options, or use both simultaneously as needed:
- Start To
From Range - This relates to student enrolment Start
Date from and Start Date to
- End To From
Range - This relates to student enrolment End Date from
and End Date to
- Start From
To End Range - This relates to student enrolment Start Date from
and End Date to
You can also use any of the
following filters together with the above range filters if applicable. These
are all optional.
- Min % Complete and Max % Complete - These filters are for RTOs that are integrated with LMS.
When only Min % Complete is entered, all units with Min % Complete Up will be displayed.
When only Max % Complete is entered, all units with Max % Complete Down will be displayed.
When both are entered, all units within the range will be displayed.
- Min % Attendance and Max % Attendance -
RTOs can specify a minimum and a maximum percentage per field.
- USI Status - You can also filter based on any of the following USI Status: Valid, Not Attempted, Invalid.
- Enrolment Status Type - There is also an available filter to narrow down your report based on any of the following enrolment status types: Pre-Enrolment, Ongoing, Completed, Discontinued Enrolment.
- Enrolment Status - Based on the selected enrolment status type, you can still filter the report based on specific enrolment status.
- Qualification Issued - You can also apply a filter to generate an enrollment report based on whether certificates have been issued or not.
You can also tick the Include
Avetmiss Fields and Only Unique Enrolments fields.
- Include AVETMISS Fields - Once selected,
all AVETMISS-related fields will be automatically included in the generated
data table.
- Only Unique Enrolments - If you prefer to
filter out any duplicate records and ensure that your report only includes
unique enrolments.
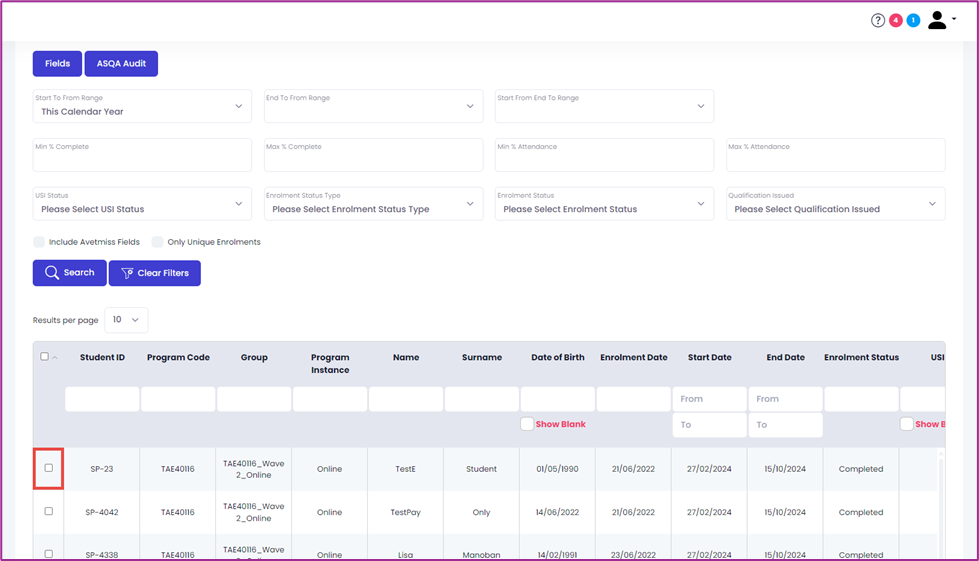
Once you have set the filters you need, click Search to generate the report.
NOTE: Even after generating your report, you can
further refine and narrow down the results by using the inline filters
available within the data table. These filters allow you to quickly adjust the
displayed data focus on the most relevant criteria.5. Click Export to convert your report to an
.xlxs file. This allows you to save, share, and further analyze the report
using spreadsheet software like Microsoft Excel.
That's it! You've successfully generated an enrolment report in the SMS.
What can you do with the generated Enrolment Report:
View Student
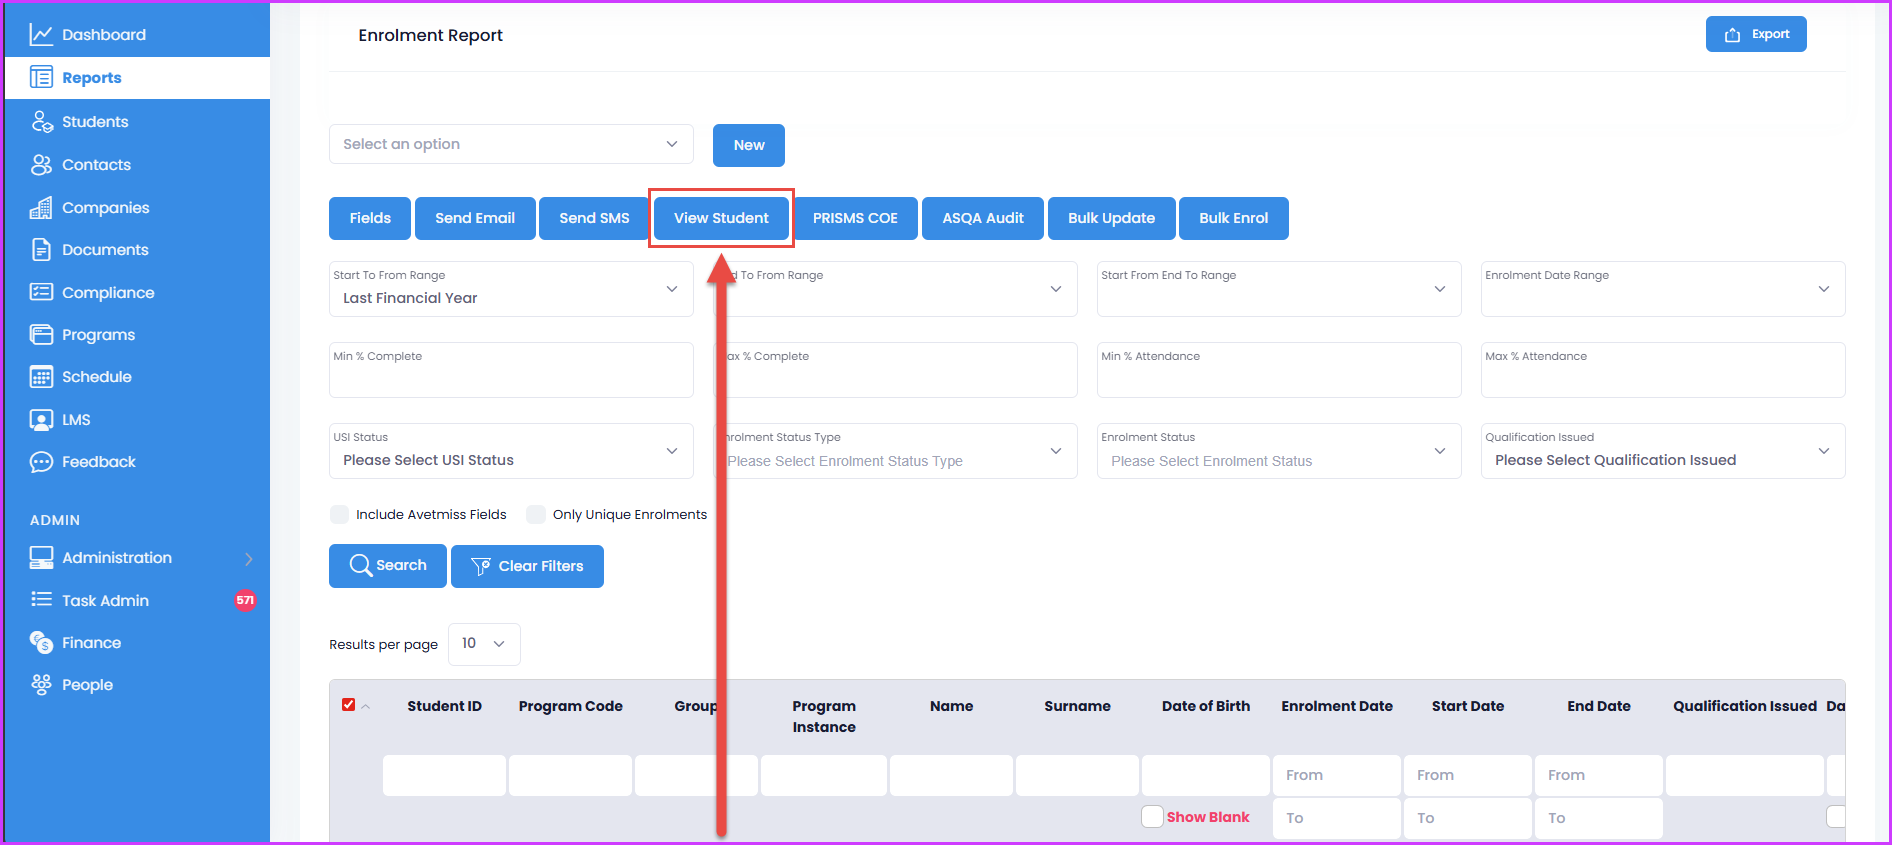
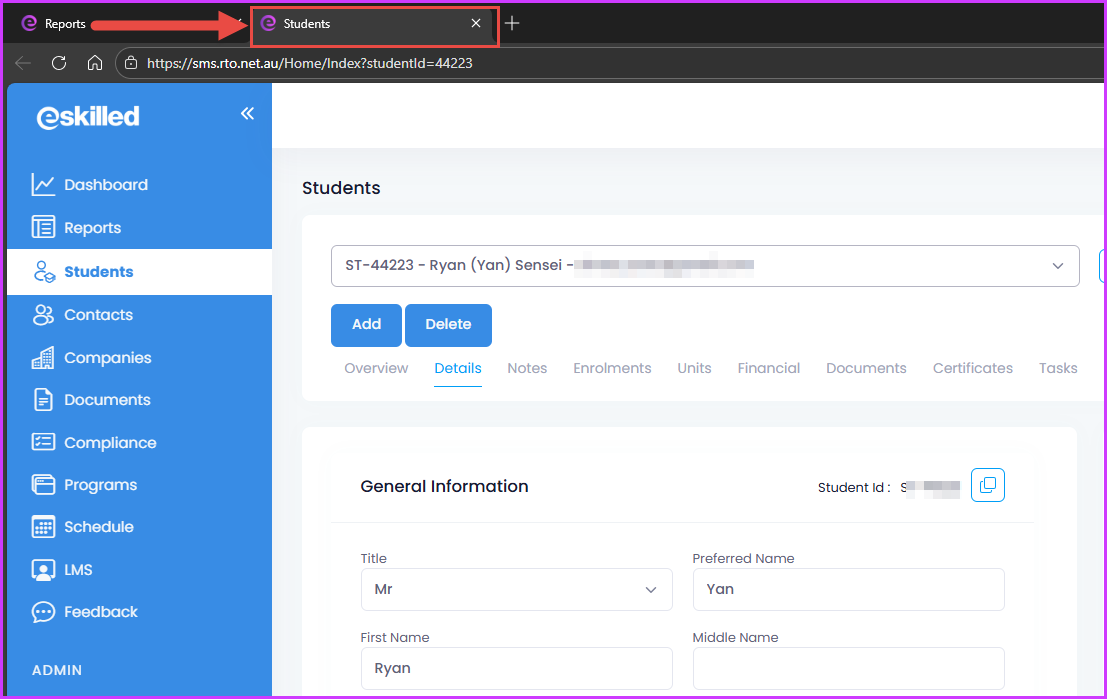
View Student
- How to Send Text Messages from the SMS
- How to Send Bulk Email
- How to Bulk Update Enrolments
- How to Bulk Enrol Existing Students
Congratulations on completing this tutorial. We hope this has been helpful to you and your organisation. For any questions or concerns regarding this function, please reach out to the contact support via email.
Related Articles
How to Generate Enrolment Report via Company Portal
Overview In the Student Management System (SMS), companies can generate enrolment reports through the Company Portal. This feature allows companies to access detailed records of student enrollments, including program details, statuses, and key dates. ...How to Generate Enrolment Report in the SMS via Trainer Portal
Overview Generating an enrolment report via the Trainer Portal in the SMS is a simple process designed to provide trainers with key insights into student enrolment data. This functionality enables trainers to access and analyse essential details such ...How to Generate Units Report in the SMS
Overview In this tutorial, we'll discuss how to generate Units Report in the SMS. Step tutorial 1. From the Dashboard, go to Reports, then Units, then click the “New” button. 2. Add your preferred report name. You may also set it as the default. Once ...How to Generate TAMS Report
Overview A TAMS (Training Activity Management System) Report in a Student Management System (SMS) provides detailed information about a student’s training activities, including enrolments, completions, attendance, results, and progress across courses ...How to Generate a Student Report in the SMS
Overview This tutorial provides a straightforward way to view and manage a list of students, with options to customise the details shown. Users can choose which fields to display, allowing them to generate a report that suits their specific ...