How to Integrate Stripe on the SMS

Overview
This tutorial on SMS Stripe Integration provides a guide for users on integrating Stripe payment processing within the eSkilled Student Management System (SMS). It covers steps to retrieve Stripe API keys, configure Stripe settings in the SMS, and ensure proper setup for both test and live environments.

Step Tutorial
Part 1 - Retrieve Stripe API Keys
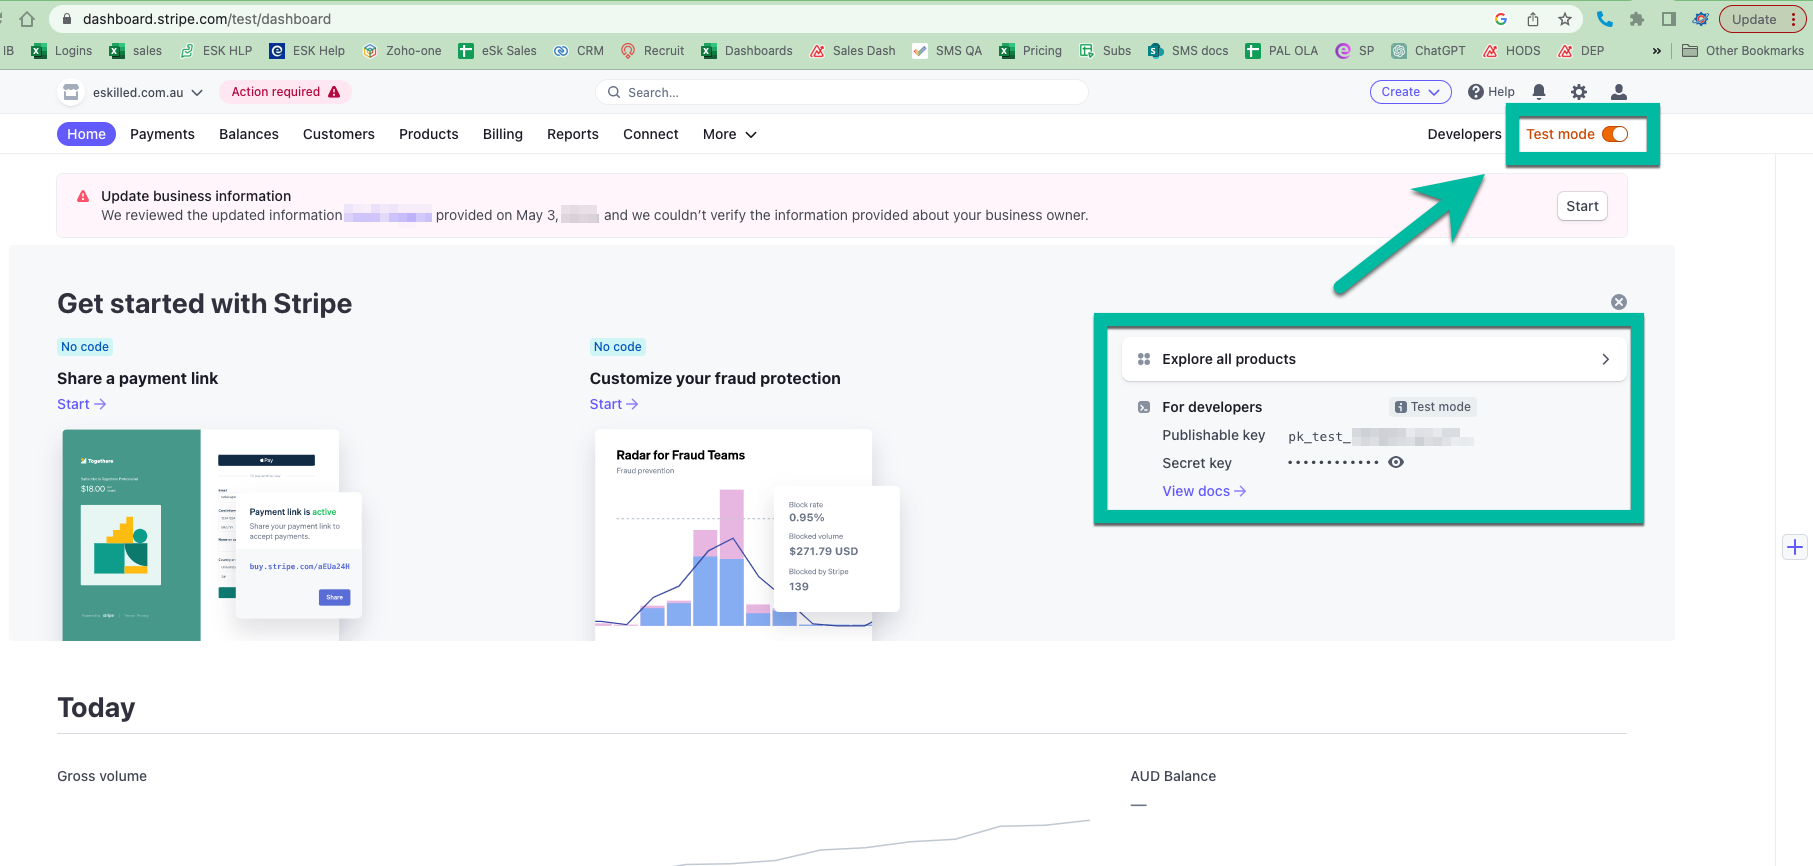
Upon registration with Stripe, you will receive a total of four keys: a publishable and secret key pair for both test and live modes (once the account is activated). These keys can be found on the API Keys page in the Developers Dashboard.
Sample Stripe API Keys Page (make sure to view Live API keys):
Part 2 - Setup Stripe Information in the SMS
1. Log in to your eSkilled SMS with your Administrator account and go to Settings. Under the Payment & Declaration tab, enter/select the following information:
Payment Type: Stripe Stripe Secret Key: Your Stripe Secret Key Stripe Publishable Key: Your Stripe Publishable Key
2. Once done, click on the Update button.
Part 3 - How to Test if your Stripe integration is Working
How to Test if your Stripe integration is Working (in TEST MODE)
1. In your Stripe Dashboard, toggle to enable Test Mode
2. Set up Webhooks as per standard Stripe set-up instructions.
3. Using the Stripe test keys, update your Stripe Information in the SMS Settings
4. In your SMS, create a test Program Instance and a Group.
5. Under Financial, set up your Program Fees.
6. Select a payment plan.

NOTE: If you plan to use payment plans with multiple instalments, ensure that you apply a payment rule designed to handle multiple payments. This setup will enable you to verify that subsequent invoices successfully save the card information, in addition to ensuring the initial payment processes correctly.
However, if payments will always be made upfront, use a payment plan with only one payment rule for simplicity.
7. Enrol a test student and pay using the test credit card. See https://stripe.com/docs/testing
What to check under your Test Student's Financial tab
- The intial invoice is paid
- Subsequent invoices have the card saved
How to Test if your Stripe integration is working (in LIVE MODE)
Setting Up your SMS and Stripe for Live Mode (Actual Use)
1. In your Stripe Dashboard, disable Test Mode.
2. Set up Webhooks as per standard Stripe set-up instructions.
3. Update your Stripe Information in the SMS using your Stripe live keys.

WARNING: Testing in LIVE MODE WILL CHARGE THE CREDIT/DEBIT CARD USED. PLEASE ONLY USE THIS METHOD FOR TESTING IF ABSOLUTELY NECESSARY.
IT IS IMPORTANT TO ADD ONLY A SMALL AMOUNT (minimum of $1) IN YOUR PAYMENT PLAN WHEN TESTING IN LIVE MODE TO AVOID EXCESS CREDIT CARD CHARGES.
1. In the SMS, create a test Program Instance and a Group.
2. Under Financial, set up your Program Fees. Note: Use a minimum of $1.00 to test
3. Select a payment plan that has multiple payment rules. Note: atleast 2 payments
4. Enrol a test student and pay using an active credit card or debit card.
5. Check the created invoices and if the payment was processed according to your payment plan rules.
What to check under your Test Student's Financial tab
- The intial invoice is paid
- Subsequent invoices have the card saved
 IMPORTANT: Once a full test has been carried out, you can then remove the stored card information and/or delete the invoices to avoid getting charged.
Congratulations on completing this tutorial. We hope this has been helpful to you and your organisation. For any questions or concerns regarding this function, please reach out to the contact support via email.
Related Articles
How to Integrate/Establish Connection between SMS and MYOB
Overview Integrating the SMS with MYOB enables automatic syncing of financial data such as invoices, payments, and student billing details. This helps reduce manual data entry, minimise errors, and streamline accounting processes for education and ...How to Integrate and Set up SMS with Xero
OVERVIEW In this tutorial, we will show users how to integrate Xero Accounting Software with the Student Management System allowing users to export invoices to Xero, mark invoices as paid in the SMS and void invoices that are deleted in the SMS. This ...Using The SMS API (2.1)
Overview The API enables your systems to connect automatically with your Student Management System (SMS). Instead of entering data manually, the API allows different programs—such as enrolment systems, finance tools, or communication platforms—to ...How to Add a User in the SMS
Overview Managing users in your student management system is crucial for safeguarding student information and maintaining efficient administration. This tutorial will guide you through the process of adding users, granting appropriate system access, ...How to Set Up RTO Information in the SMS 2.0
Overview When setting up your SMS for the first time, it is important to ensure that all your SMS settings, including the RTO information is set up correctly. For RTO's who submits VET Activity data annually, the RTO information is also required in ...