Sending Notifications to Users in the SMS

Overview
Notifications in the SMS are messages and alerts delivered to users directly within the SMS web application. This communication channel allows users to provide relevant information, updates or reminders to all or selected users of the Student Management System within their organisation. This feature ensures that important information are cascaded to the relevant people.
In this
tutorial, we will show you how to create and view Notifications. This
tutorial will also show the different fields required for setting up Notifications
and how these are displayed to the users in your organisation, as well as provide information on how to view related Notifications activity in the SMS.

Step Tutorial

Notifications can only be created by users with Admin roles. Notifications will only show for users that are assigned either an Admin or Trainer role in the SMS.
Step 1. Login to the SMS and navigate to the Notifications page.
Step 2. Click "New"
Step 3. A notification window will open. Complete the fields following the information below:
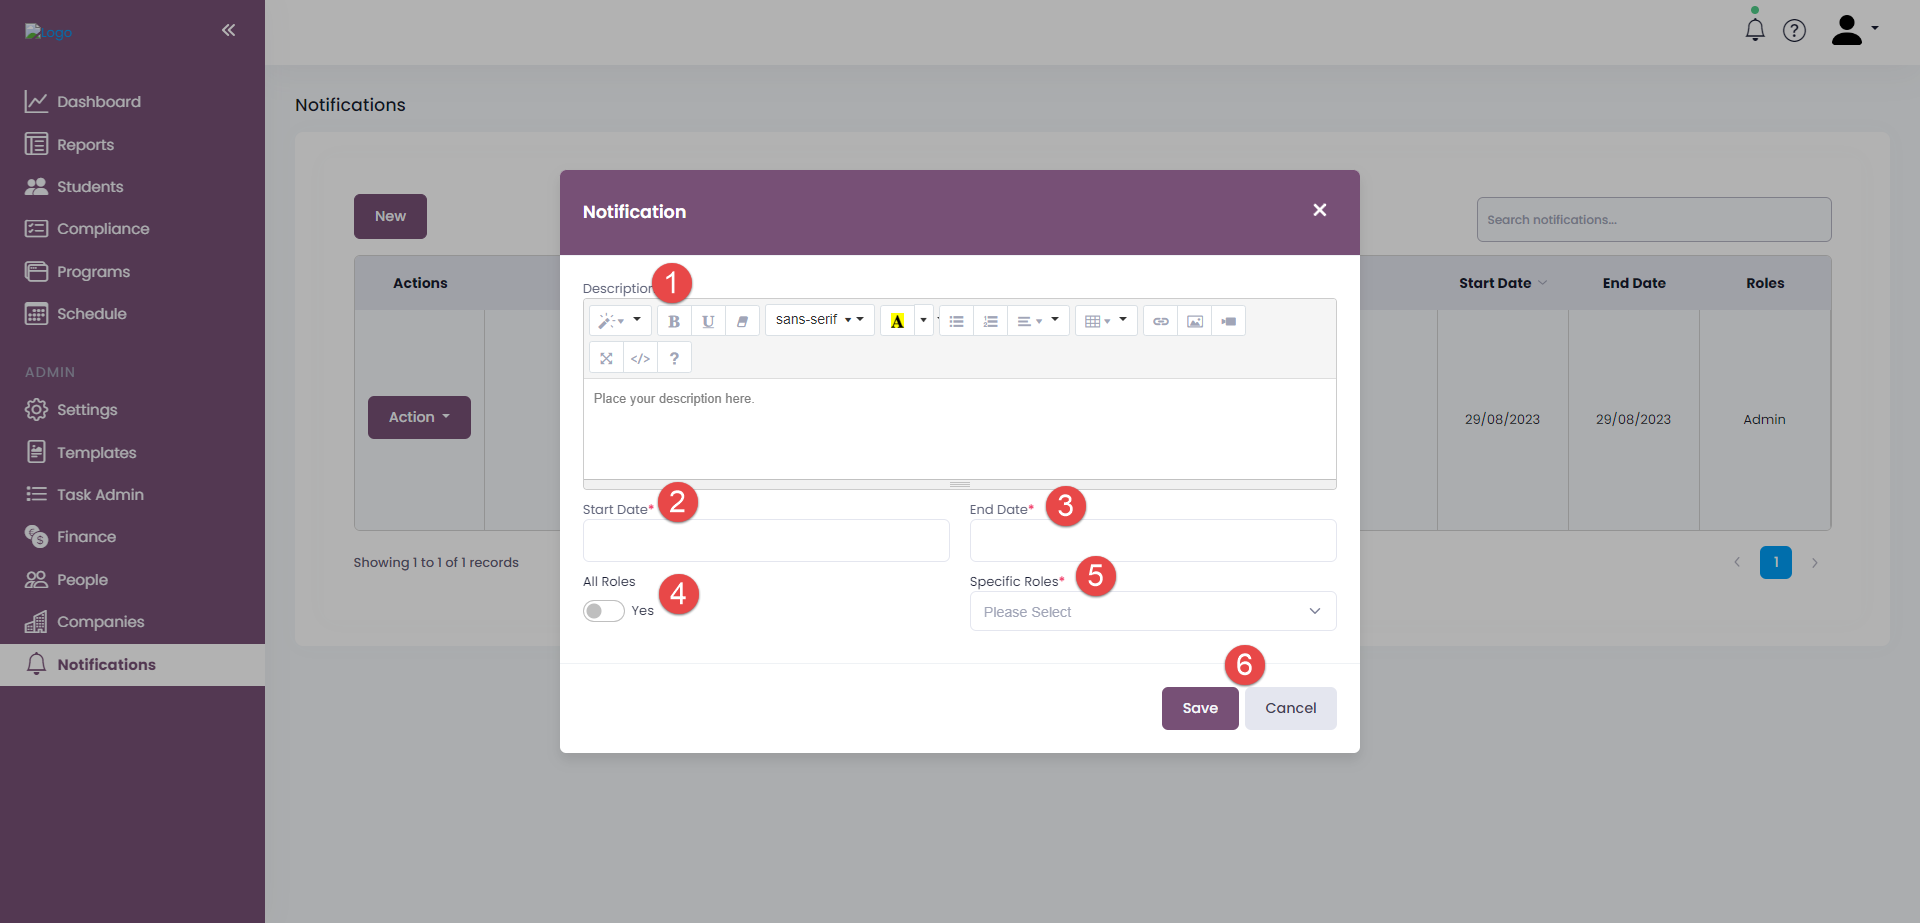
- Create the notification content in
the Description box. You can customise and format your Notification message using the HMTL toolbar. Expand the description area for easy viewing of the content. Dynamic fields to add the logged in user's name provides additional customisation.
- Set the start date when Notification
will start showing to users.
- Set the end date when Notification will no longer display in the SMS.
- Toggle the “All Roles” switch to YES if you would like the notification to be displayed for all user roles (Admin and Trainer Roles). Keep the Toggle to the default NO to set the notification to display for specific users.
- Specify which users should receive the notification in the Specific Roles dropdown field. Currently, this can be set to users with either an Admin or Trainer role in the SMS.
- Click Save to set the Notification or cancel to discontinue.
All notifications created are viewable in the Notifications page in a data table which includes relevant information on the Notification. Administrators can edit or delete the notification as needed.
HOW
NOTIFICATIONS ARE DISPLAYED IN THE SMS
Once a notification is scheduled to display,
this will show in the selected users as a notification window on their login.
While using the SMS, any new notification received will also be prompted by a
flashing green dot on top of a notification bell to indicate that a new notification is
available.
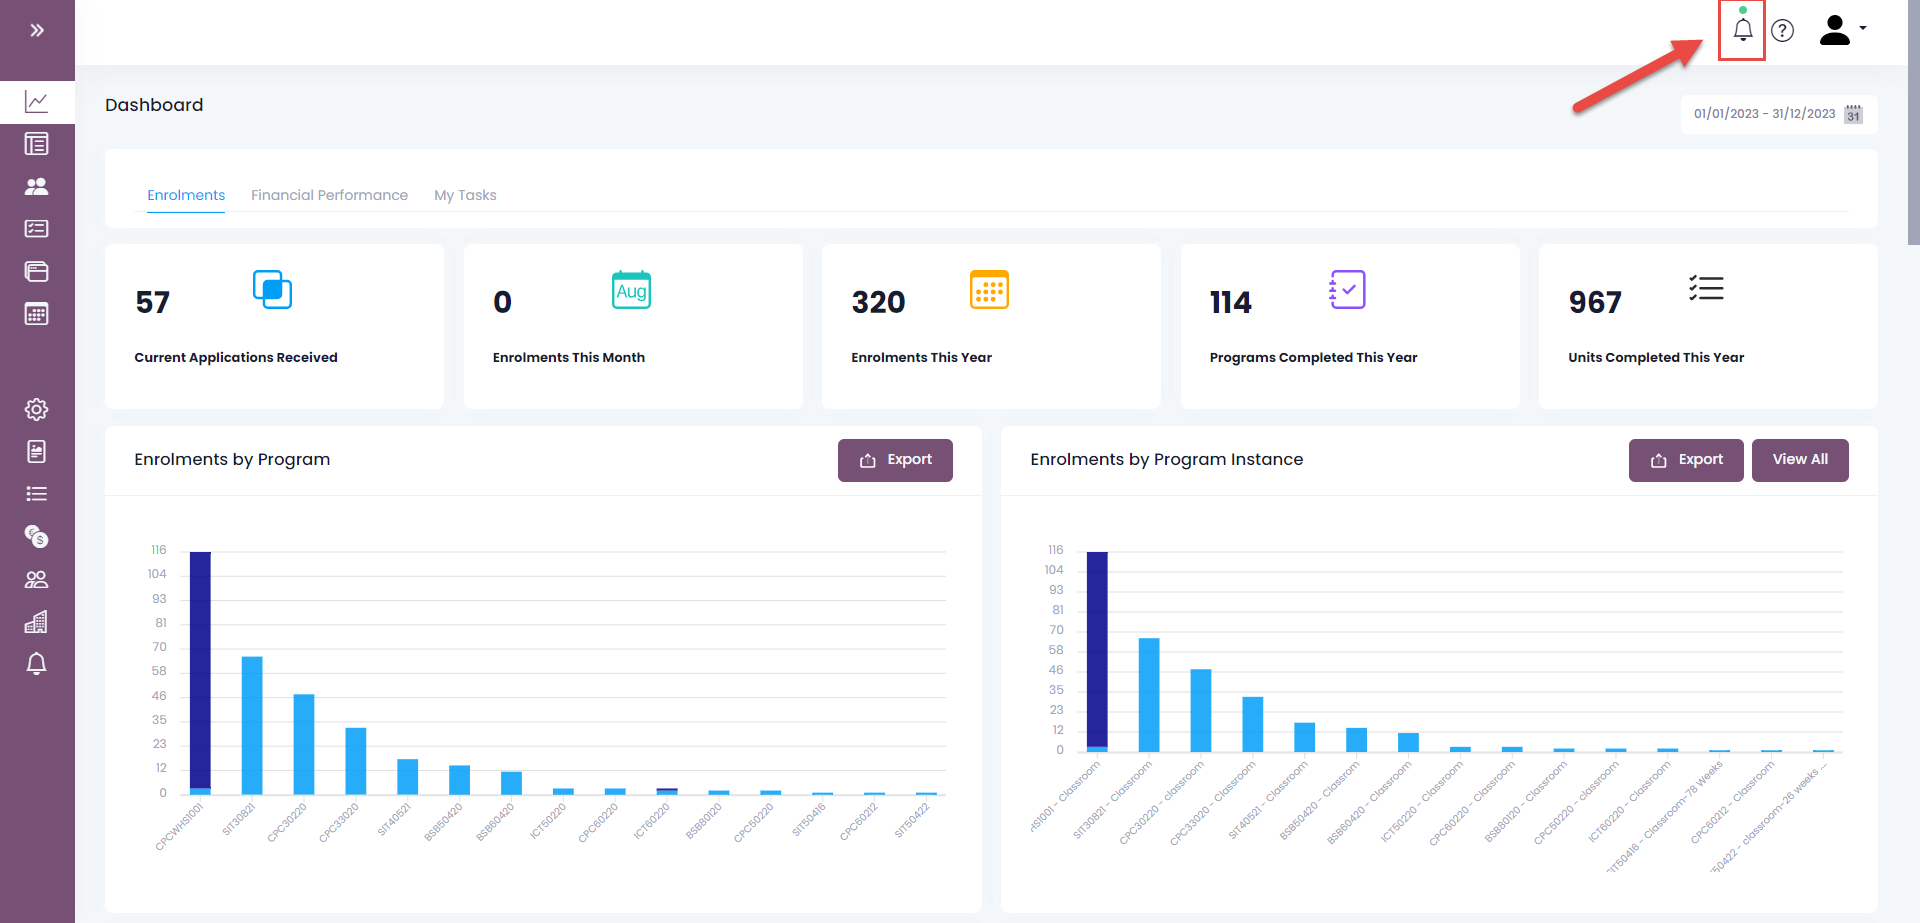
Clicking on the notification bell will open a notification drawer displaying all Notifications received.
Users can click on the “DO NOT SHOW AGAIN” to remove the Notification.
To view all notifications received, click “View All Notifications”. This will open a page with all the Notifications received.
CHECKING NOTIFICATION LOGS
Notifications are also included in the Activity Logs, to check who created a notification, edited and deleted a notification as well as include information on the date of activity.
Note: Notifications removed or have passed their End Dates will no longer display in the Notifications page.
Try out this awesome feature now to share exciting news and updates within users of your Student Management System!
Related Articles
How to Check Sent Emails and Notifications Related to a Student
OVERVIEW In this tutorial, we will show users how to check emails sent to students in the SMS. We will also show sample email notifications related to a student that can be retrieved in the Students Notes. Step Tutorial: 1. From Students, select the ...Sending Text Messages from the SMS
OVERVIEW In this tutorial, we will show how you can send an SMS or text messages to students from the Student Management System. Note: This is a paid add-on feature of the SMS. You may contact our support team at support@eskilled.com.au if you are ...Setting Up Email Templates in the SMS
OVERVIEW In this tutorial, we will show users how they can update default or create new email templates in the SMS. These templates can be used when sending out emails to students without having to start all over. Furthermore, these templates are the ...Creating Email Workflows in the SMS
OVERVIEW This tutorial will show users how to set up automatic emails that will send to students based on certain triggers. In the SMS, you can set up Email Workflows in each of your program instance. We will walk you through on how you can set up ...Making Notes and Sending Emails to Students in the SMS
OVERVIEW In this tutorial, we will walk you through on how you can send emails and lodge every interaction you had with your students. This is relatively important when you need to inform or send updates to students about their training or enrolment. ...